How to Make Sublimation Patches: A Step-by-Step Guide
November 9, 2024
What’s the Best Fabric for Embroidery Patches
June 25, 2026
What’s truly tricky about custom patches is when you end up with regrets about the measurements you took. Picking that perfect standard patch size can be a puzzle because your patch is unique muddle and you want know there will be superb visual clarity (no rough guesses!). That’s why before you order custom patches online you have to know the basics. What affects patch sizes and why it matters what you place these on. Plus how you can take the right size yourself.
Let’s find out.
What is The Standard Patch Size for Custom Patches?
There is no clear-cut answer because patch sizes are about so much more than choosing just one number. Your end goal with custom patch sizes is something that’s charming and that people can see and read without fuss. You may be looking for a standard size but the right dimensions depend on many factors like various scaling options (depends on how your design needs to appear in real life).
So ask yourself a few key questions before you decide on a size.
- What is your ideal size for a patch? Small or takes over the piece it is on?
- Will it have only text or only graphics or a mix of both?
- What is the fabric type of the surface that will hold the patch?
- What kind of patch do you want? Embroidered? Chenille? Or sublimated?
What you answer for each one of these from design style to application purpose matters as that is how you will arrive at a size that works best.
Get to Know Materials Before Choosing the Perfect Standard Patch Size
Think about the popular embroidered patch and top-notch details mean you need to consider the thickness of thread and how dense they will be. Plus add in material constraints and how wide the letters are.
Assume you go for a small hat patch for a soccer match where the text with the team name has heavy thread work. You will likely get less readability with embroidery work but end up sharper dye sublimation patch results along with fabric-like details. To sum it up we can confirm that small text breaks down quickly even with skilled digitizing.
You need to know how each material handles detail and scaling so you decide a size that works.
- Embroidered patches need more space for clean letters (more so for branding visibility)
- Chenille patches suit larger and bold layouts like the varsity jackets
- Sublimation patches can bring to life all the small details in a superb way
- PVC patches stand out due to vivid colors and very sharp details even in compact forms
Other than ‘what’ makes up the patch you will also need to know ‘where’ to use the patch. When it comes to the best patch size for jackets the size range is flexible but a small hat patch plays by different rules. So it’s time to think about the garment or accessory once you’ve got your material sorted!
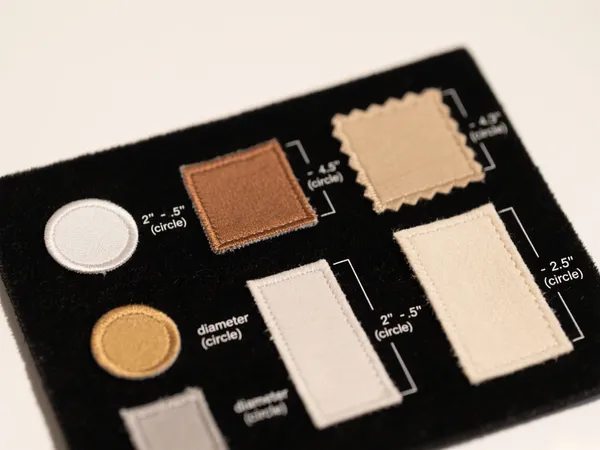
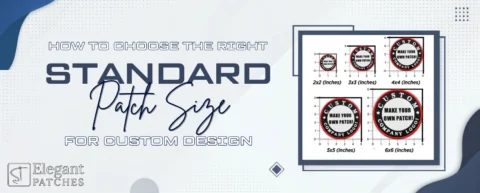
Standard Patch Size Chart for Custom Designs
Choosing the right size for any patch does depend on instincts but it is not ALL guesswork. Not only do you want the patch to balance well with what you place it on but also keep your costs fair. Patch makers calculate what you pay according to the size measurement. Whether you are creating a simple logo patch or working on embroidered biker patch designing, selecting the right dimensions is how you can avoid a too-high quote due to a larger patch when a smaller size would have been a much better fit.
You can check out this helpful size chart to learn how to choose the right standard patch size.
Where Will You Place the Patch? | Ideal Size Range (in inches) |
Front Hat Branding | 2 to 3.5 |
Left Chest Logo | 3 to 4 |
Custom Sleeve Badge | 3 to 4 |
Employee Name Tag | 3 to 4 |
Backpack Logo Display | 2 to 3.5 |
Tactical Gear Morale | 2 to 3.5 |
Scout & Achievement | 3 (approximate) |
Front Backpack Panel | 3 to 5 (width) |
Beanie Cuff Logo | 1.5 to 2.5 (width) |
Full Jacket Back | 10 to 12+ (width) |
This size chart a great reference if you are wondering what size patch should I order but you have to keep in mind that graphics vs. text ratio may affect your final size. A great example is where you may not be able to fit all-text embroidered patches into a 2-inch size without the letters losing shape. A sublimation type will in fact display fine details, or you will have to simply size your embroidered patch.
If ever in doubt then focus on legibility rather than trying to fit a design into the small patch size!
How To Measure A Patch Correctly
Measuring a patch is not complicated but it is one of those steps that people often rush through. What sizing works as a standard patch size for uniform will not be the same as that you take for a bag. Taking a few minutes to check your patch dimensions can save you from getting a patch that looks too large or too small just all wrong.
- Start by finding the widest section in your artwork
- Take the size from the highest to lowest point
- Do leave some breathing room around the design
- Give your sizing one final review and you are done!
These simple steps help you judge design compatibility in a more real way when you follow these along with the custom patch size guide table. You can take a paper printed cutout of design and tape it onto a hat or jacket or backpack to see how the patch looks from different angles and distances.
The Final Word on Patch Sizing
Suffice to say that you need to be careful about everything that changes the way a patch turns out when you start the process of creating the right standard patch size. You don’t want regrets after placing your order.
Quality and resolution also matter so go for vector files to get sharpest results since. High-resolution PNG or JPG files at 300 DPI are a must when you want to make sure your patch design looks and professional in real life.
We can help you achieve this and more. At Elegant Patches our skilled team can also create artwork if you don’t have one by bringing your ideas to life from your description. If you’re ready to take the next step then you can request a custom patch quote today.
