How to Make Your Embroidered Biker Patches from Scratch
August 5, 2024How to Make Sublimation Patches: A Step-by-Step Guide
Sublimation patches have become a popular choice for businesses, crafters, and DIY enthusiasts due to their vibrant, long-lasting colors, intricate designs, and professional finish. Whether you’re looking to create sublimation patches for hats, custom sublimation patches, or printed patches for shirts, the process of making these high-quality, custom pieces can be incredibly rewarding.
In this blog, we’ll walk you through how to make sublimation patches from start to finish, and explore the tools, materials, and steps involved. Plus, we’ll dive into the various types of sublimation patches, including sublimation iron on patches and dye sublimation patches, to help you understand their unique features and uses.
What Are Sublimation Patches?
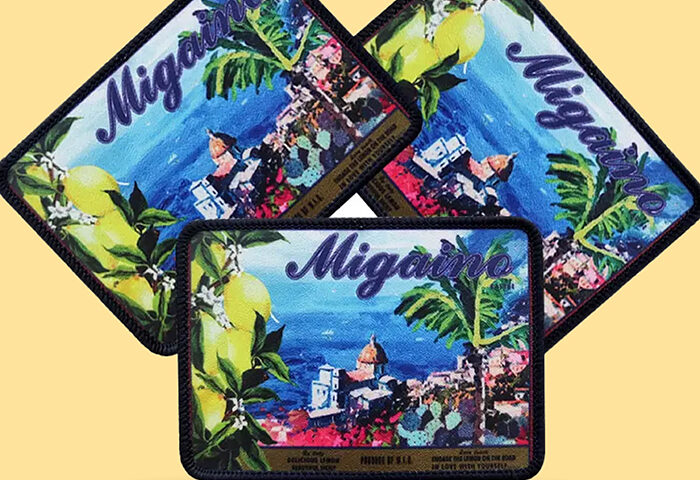
Sublimation patches are fabric patches made using a heat transfer method called dye sublimation, which embeds dye directly into the fibers of the fabric. This process results in vibrant, full-color images that won’t fade, peel, or crack over time. Custom sublimation patches are commonly used for branding, personalizing apparel, or creating unique merchandise.
These patches are particularly popular for items like sublimation patches for hats, sublimation patches for shirts, and other custom apparel. The finished patches can be sewn or ironed onto clothing and accessories, making them versatile and highly customizable.
Materials You’ll Need to Make Sublimation Patches
Before you dive into the process, you’ll need a few key materials. Here’s a quick list of what you’ll need to create custom sublimation patches:
- Sublimation Paper: This is used to print your designs. It’s specifically designed to hold the ink in a way that allows it to transfer to fabric when heat is applied.
- Polyester Fabric: The fabric must be at least 60% polyester (though 100% polyester is ideal) for the sublimation process to work effectively. Polyester fabric is what allows the dye to bond with the fibers.
- Heat Press Machine: A heat press machine is crucial for transferring the design onto your fabric. It applies heat and pressure evenly, ensuring a smooth and durable transfer.
- Sublimation Ink: Special sublimation inks are used in the printing process. These inks turn into gas when heated, bonding with the polyester fibers and creating vibrant colors.
- Cutting Tools: You’ll need scissors, a cutting machine (like a Cricut or Silhouette), or a laser cutter to trim your patches once they’re printed.
- Heat-Resistant Tape: This helps secure the design onto the fabric before pressing.
- Backing Material (Optional): If you want to create sublimation iron on patches or custom printed patches that can be easily applied to items without sewing, you can use an adhesive backing or a fabric backing for extra stability.
Step 1: Design Your Sublimation Patch
The first step in creating custom sublimation patches is designing the artwork. You can create your design using graphic design software like Adobe Illustrator, Photoshop, or free tools like Canva. The key is to ensure your design is in high resolution (at least 300 DPI) to maintain crispness when printed.
Consider the following when designing your sublimation patch:
- Size and Shape: Decide on the size and shape of your patch. You can go with standard round, square, or rectangular patches, or opt for custom shapes like logos or mascots.
- Colors: Choose vibrant colors for your design, as sublimation excels in reproducing rich, vivid tones. Keep in mind that the colors on your screen may appear differently when printed, so it’s helpful to do a color test before printing your final design.
- Font and Graphics: If you’re incorporating text, choose fonts that are bold and easy to read. Remember that sublimation works best with sharp, clean lines.
Once you’re satisfied with your design, save it as a high-resolution PNG or JPG file.
Step 2: Print the Design onto Sublimation Paper
After finalizing your design, it’s time to print it onto sublimation paper using a sublimation printer. Make sure to mirror your image before printing, as the design will be transferred in reverse onto the fabric.
When printing, ensure you’re using sublimation ink in your printer. This is key to achieving the vibrant and long-lasting colors associated with dye sublimation patches.
Step 3: Prepare the Fabric for Sublimation
Next, prepare the polyester fabric that you’ll be using for your patch. Cut the fabric to the size and shape you want your patch to be, leaving a little extra around the edges if you plan to trim it later.
To get the best results, it’s a good idea to pre-press the fabric for a few seconds using your heat press machine. This will remove any wrinkles and moisture, ensuring a smooth and clean transfer of your design.
Step 4: Transfer the Design with a Heat Press
Now comes the exciting part—the actual sublimation process! Here’s how to transfer your design onto the fabric:
- Place the Fabric on the Heat Press: Set your fabric onto the heat press platen, ensuring it’s smooth and flat.
- Position the Sublimation Paper: Place the printed sublimation paper (image facing down) on top of the fabric. Secure the paper in place with heat-resistant tape to prevent it from shifting during the transfer process.
- Set Temperature and Time: Set your heat press to the recommended temperature (typically around 400°F or 200°C) and pressure. Sublimation usually requires about 30–60 seconds of heat.
- Press the Design: Lower the heat press and let it run its cycle. The heat and pressure will cause the sublimation ink to turn into gas and bond with the polyester fibers of the fabric.
- Peel the Paper: Once the press is done, carefully remove the sublimation paper. You should now have a vibrant, full-color design permanently transferred to your fabric!
Step 5: Cut the Patch to Shape
After the sublimation process is complete, it’s time to cut your patch. Use scissors, a rotary cutter, or a cutting machine to trim around the design. If you’ve left an extra border around the edges, you can now cut it to the exact shape and size you prefer.
If you’re creating sublimation patches for shirts or sublimation patches for hats, you can leave the edges raw for a trendy look, or you can sew or iron on a border for a more finished appearance.
Step 6: Apply the Patch
Now that your sublimation patch is complete, it’s time to attach it to your desired product. There are several options depending on the type of patch you’ve made:
- Sew-on Patches: Use a sewing machine or needle and thread to sew the patch onto jackets, shirts, hats, or bags.
- Iron-on Patches: For sublimation iron on patches, simply place the patch on the fabric, cover it with a thin cloth, and press it with an iron for a few seconds (using medium heat) until the adhesive backing bonds with the fabric.
- Heat Press for Patches: If you’re using a heat press to apply custom printed patches, set the temperature and time according to the manufacturer’s recommendations for iron-on patches.
Why Choose Sublimation Patches for Your Business?
Creating sublimation patches offers numerous benefits for businesses looking to promote their brand, outfit employees, or create custom merchandise. Here are a few reasons why you might want to use custom printed patches:
- No Minimum Order: Many suppliers offer custom printed patches no minimum, allowing small businesses to order patches in any quantity, whether it’s for a one-off project or large batch production.
- Versatility: Sublimation patches for hats, shirts, and other apparel items can easily be customized to fit your needs.
- High-Quality, Durable Designs: Sublimation provides crisp, long-lasting designs that will not fade, crack, or peel over time, ensuring your branding stays intact.
- Low-Cost Production: Compared to other custom apparel options, sublimation patches are a cost-effective solution for businesses looking to produce high-quality promotional items without breaking the bank.
Conclusion
Making sublimation patches is a fun and creative process that yields professional-looking results. Whether you’re looking to create sublimation patches for hats, custom sublimation patches for shirts, or sublimation iron on patches for easy application, the possibilities are endless. By following the steps outlined in this guide and using the right tools and materials, you can create high-quality dye sublimation patches that make a lasting impression and help promote your brand effectively.
So why wait? Start creating your own custom printed patches today and take your branding to the next level!


